This is part three of the Building a Voice-Driven TV Remote series:
- Getting The Data
- Adding Search
- The Device API
- Some Basic Alexa Commands
- Adding a Listings Search Command
- Starting to Migrate from HTTP to MQTT
- Finishing the Migration from HTTP to MQTT
- Tracking Performance with Application Insights
So now I've got a search engine for channels and TV listings, but none of this is particularly useful without a way to communicate with my actual devices. As mentioned in the first post, I'm using a Harmony Elite/Hub to manage my living room devices.
While they don't exlicitly offer a useful API for my purposes, I was able to find a nice project named harmony-api that provides a HTTP service for interacting with the hub and runs via Node. Four or five years ago I picked up an early version of the Raspberry Pi and subsequently did very little with it, so this seemed like a good opportunity to dig that up and make use of it to host this internal server.
The Domain and No-IP
Obviously I don't want to simply leave an API to my living room devices open to the whole world, so most of this post is really just around how I set up the hosting and security around it. First I wanted to have a domain name to represent my house that I could tie a certificate to. This is when I discovered that the .house TLD exists, so shackles.house was born.
I've been using No-IP's free tier for awhile now for dynamic DNS, so I decided to upgrade to their Plus plan to allow for using a custom domain. At $35/year the cost is pretty minimal.
Using No-IP requires having an agent running on your network that periodically pings them with your current IP. Luckily they made it really easy to run that agent on a Raspberry Pi, so the Pi can operate as the No-IP agent as well. No-IP has detailed instructions on setting that up here.
NGINX
I'm definitely not going to want to just open the Harmony API's port to the world, so that's where NGINX comes in. NGINX is a nice HTTP server and reverse proxy that will make it easy to layer in security on top of the API, without having to modify the API itself at all.
To install NGINX:
sudo apt-get install nginx
Originally I set out to use Docker images for everything but ran into some issues due to the Raspberry Pi's CPU architecture and decided it wasn't worth the pain for now. I'll probably revisit this at some point down the line.
While we're at it, go ahead and edit the file /etc/nginx/sites-available/default to pave the way for the next section. Inside the service block add the following:
location ~ /.well-known {
    allow all;
}
This will be used by Let's Encrypt in the next section. After editing that file, run:
/etc/init.d/nginx restart
Let's Encrypt
In addition to the proxy I also want the traffic to this API to be secure so I'll need a certificate. Let's Encrypt is an awesome free certificate authority that makes it easy to get set up with your own certificates.
Get The Certificate
Let's Encrypt offers a nice command line utility called certbot to help set up and renew your certificates. Unfortunately I ran into a lot of issues setting this up on my Raspberry Pi, again due to the CPU types, but I was able to get things going by using the following version:
wget https://dl.eff.org/certbot-auto
chmod a+x certbot-auto
mv certbot-auto to /usr/bin
With that set up, run the following command (substituting in your own domains, of course):
certbot-auto certonly -a webroot --webroot-path=/var/www/html -d shackles.house -d www.shackles.house
This will set up and download your certificates for you automatically. This step requires that /.well-known path set up in the previous section.
Lock Down NGINX
In addition to just having a certificate, there's a bit more we can do to lock down NGINX with good security settings. First I suggest running the following command:
openssl dhparam -out /etc/nginx/ssl/dhparam.pem 4096
This can take a really, really long time to run on the Raspberry Pi, at least on the very old model I've got. This will help OpenSSL perform more secure key exchanges.
With that done, open up that NGINX config again from earlier and update the server section:
server {
  listen 80 default_server;
  listen [::]:80 default_server;
  listen 443 ssl default_server;
  listen [::]:443 ssl default_server;

  server_name shackles.house www.shackles.house;
  ssl_certificate /etc/letsencrypt/live/shackles.house/cert.pem;
  ssl_certificate_key /etc/letsencrypt/live/shackles.house/privkey.pem;

  ssl_protocols TLSv1 TLSv1.1 TLSv1.2;
  ssl_session_cache shared:SSL:10m;
  ssl_session_timeout 10m;

  ssl_prefer_server_ciphers on;
  ssl_ciphers 'EECDH+AESGCM:EDH+AESGCM:AES256+EECDH:AES256+EDH';

  ssl_dhparam /etc/nginx/ssl/dhparam.pem;

  add_header X-Frame-Options DENY;

  ...
Here we use the new certificate we got from Let's Encrypt, and also set up some other good settings for NGINX. Eventually I'd also like to get rid of TLS v1.0 and v1.1, but I ran into some issues accessing the site from Azure Functions without those, so I'll keep them in for now.
Now when I run a scan on SSL Labs things are looking a bit better:
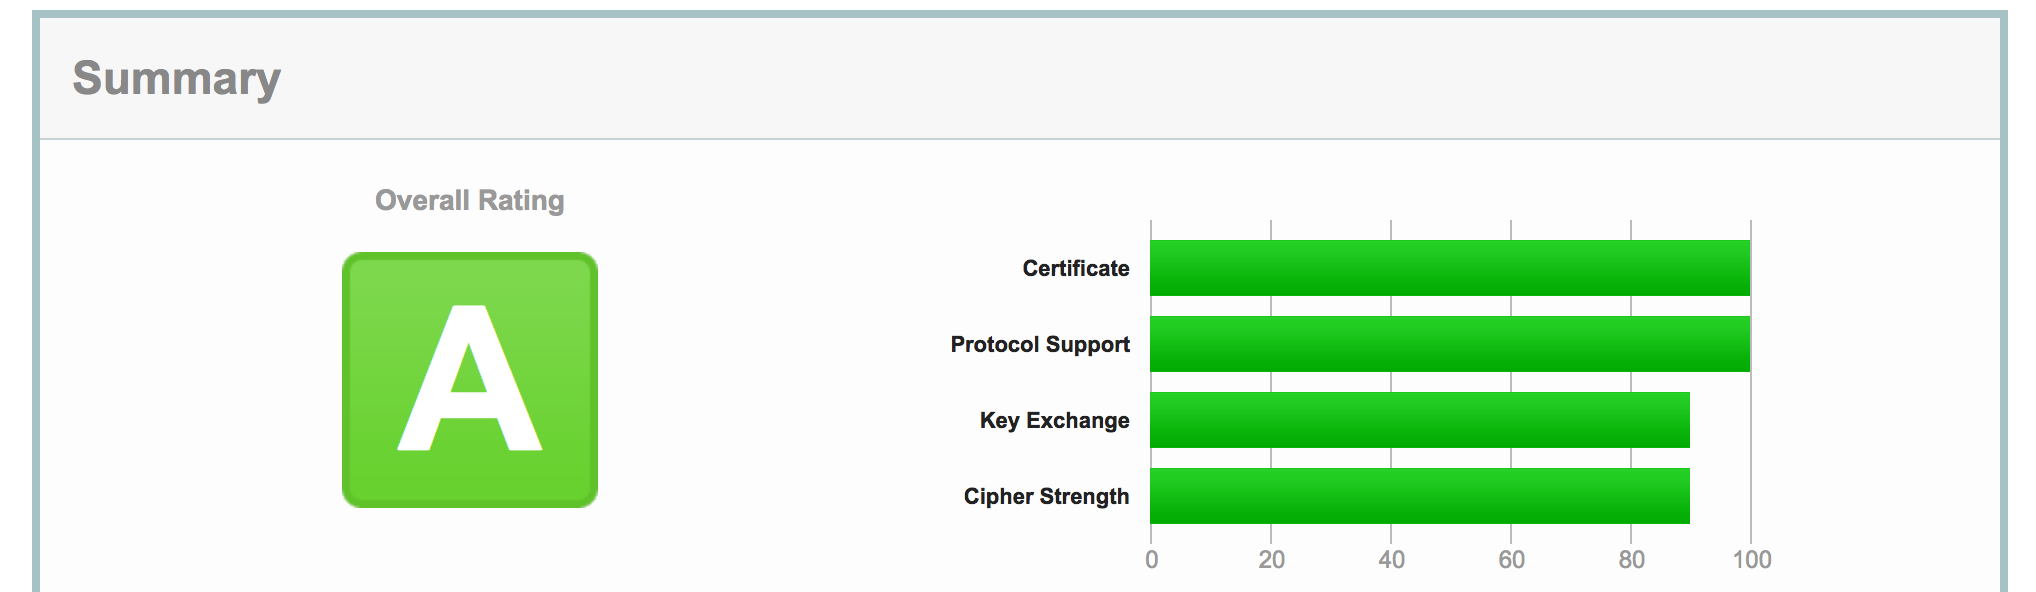
There's still some room for improvement, certainly, but this will do the trick for now.
Renewing The Certificate
The last piece of the certificate puzzle is periodically renewing them, since Let's Encrypt certificates expire after 90 days. Their certbot utility makes this easy, so it's just a matter of scheduling it to run.
We'll use cron to schedule that, by running crontab -e and adding the following entries:
0 3 * * 1 /usr/bin/certbot-auto renew >> /var/log/certbot-renew.log
5 3 * * 1 /etc/init.d/nginx restart
At 3:00am every Monday, certbot will renew its certificates, and then at 3:05am it will restart NGINX to pick up on those certificates. Easy!
Harmony API
With all that out of the way we can finally set up the Harmony API:
npm i -g forever
apt-get install git
wget https://github.com/maddox/harmony-api/archive/master.zip
You can then extract that zip wherever you'd like, such as '/home/pi/harmony-api`.
Start On Boot
We'll then want the API to start as a service whenever the device boots, so add a file named /lib/systemd/system/harmony.service that contains:
[Unit]
Description=Harmony API
After=syslog.target network-online.target

[Service]
Type=simple
User=pi
ExecStart=/home/pi/harmony-api/script/server
Restart=on-failure
RestartSec=10
KillMode=process
PIDFile=/var/run/harmony-api.pid
StandardOutput=inherit
StandardError=inherit
SyslogIdentifier=harmony-api

[Install]
WantedBy=multi-user.target
Then tell the system to start this service on boot:
sudo systemctl enable harmony.service
Add To NGINX
With that running, it's time to add the API to NGINX so we can expose that to the outside world. Add a file named /etc/nginx/sites-available/harmony that contains:
limit_req_zone $binary_remote_addr zone=harmonyzone:10m rate=1r/s;

server {
  listen 9000 ssl default_server;
  listen [::]:9000 ssl default_server;

  ...same security lines from earlier...

  if ($http_authorization != 'letmein') {
  	return 401;
  }

  location / {
    limit_req zone=harmonyzone burst=5;
    proxy_pass http://127.0.0.1:8282;
    proxy_redirect off;
  }
}
There are a couple nice things I was able to easily do here via NGINX configuration. First, I expose a port (9000) that proxies to the Harmony API port of 8282. I add in the certificate and security settings used previously, add in a HTTP Authorization header check, and also add in some basic rate limiting, all without having to touch the actual API. Now I can expose port 9000 instead of 8282, and get to take advantage of all of this. I'll certainly tweak some of the settings here (and also won't actually ship with that password...), but you get the idea.
To turn on that site, run:
ln -s /etc/nginx/sites-available/harmony /etc/nginx/sites-enabled/harmony
/etc/init.d/nginx restart
Test In Azure Functions
None of this matters if I can't access the API through Azure Functions, so let's verify that works. I'll create a new function called HarmonyTest:
open System.Net
open FSharp.Data

let Run(input: string, log: TraceWriter) =
    Http.RequestString("https://shackles.house:9000", headers = [ "Authorization", "letmein" ])
    |> log.Info
Running that successfully prints out the contents of the landing page of the API, so we're good to go!
Summary
Now that I've got a search engine and a secure API to my devices, I can now start tying these things together to actually perform some tasks. More to come soon!
Next post in series: Part 4: Some Basic Alexa Commands